DIY RENOVATION
***************************************************
*For any web links in the text copy and paste or, hit-lite and Right click."
Back in 2007, living in a new state, with my drums all back in storage in another state, a friend found a couple drum sets for me to mess around on. No name, beginner-line drums. Pretty beat up. Two 5pc. kits. No snare drums so, 8 drums to work with.
I asked him if I could fix them up; renovate them. He said they were now mine, and go for it.
I did a general pictorial of the process, and placed it on a discussion forum. It was well received, and my ambassadorship for D.I.Y. gained some new believers.
I lost those pictures and found them this morning and decided to put up a page about the renovation.
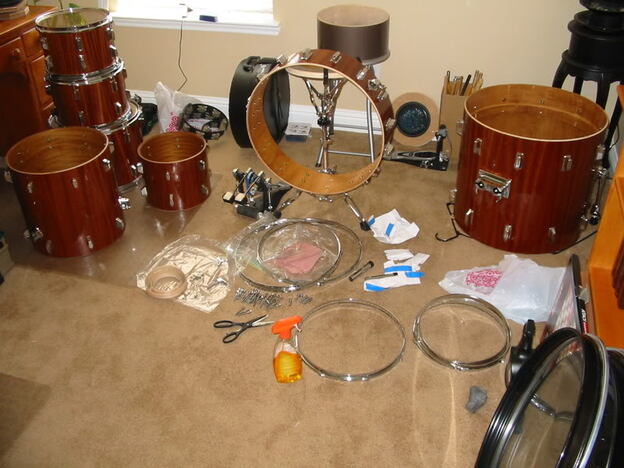
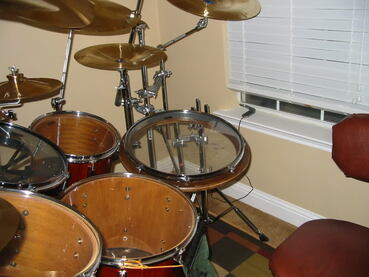
First, I didn't take a true before pic, as I began the work before I thought about a pictorial but, the first pic shows what I had to work with, all apart and some aspects already begun. What the shells were wrapped in, inexpensive Blue and Black vinyl of some kind, is shown.
I asked him if I could fix them up; renovate them. He said they were now mine, and go for it.
I did a general pictorial of the process, and placed it on a discussion forum. It was well received, and my ambassadorship for D.I.Y. gained some new believers.
I lost those pictures and found them this morning and decided to put up a page about the renovation.
First, I didn't take a true before pic, as I began the work before I thought about a pictorial but, the first pic shows what I had to work with, all apart and some aspects already begun. What the shells were wrapped in, inexpensive Blue and Black vinyl of some kind, is shown.
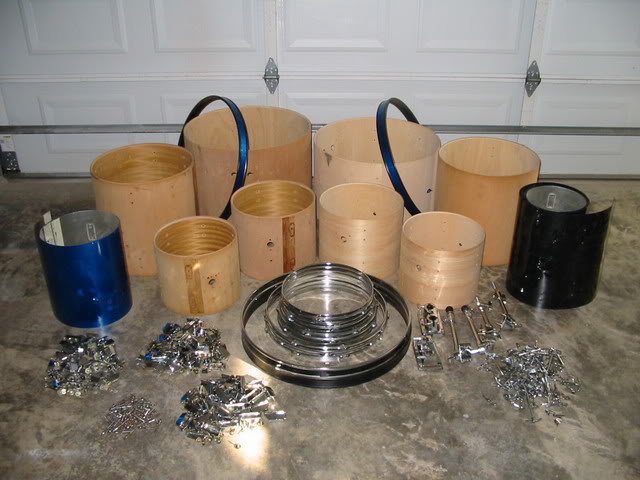
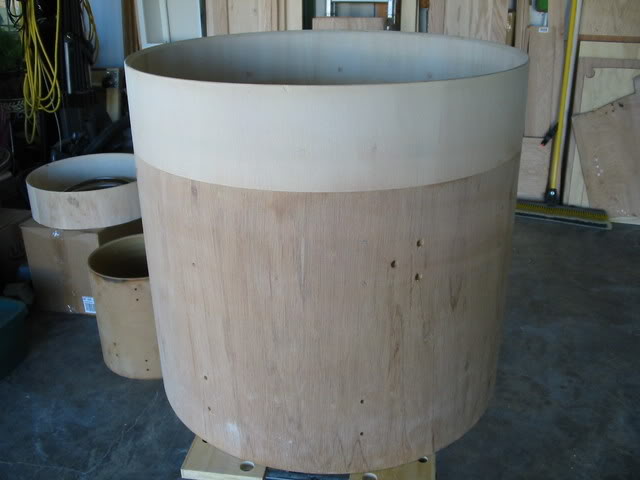
Some of the drums were damaged and painted in side. I decided to place a layer of veneer over their insides, in this case Mahogany, which end up on the outside of all the drums.
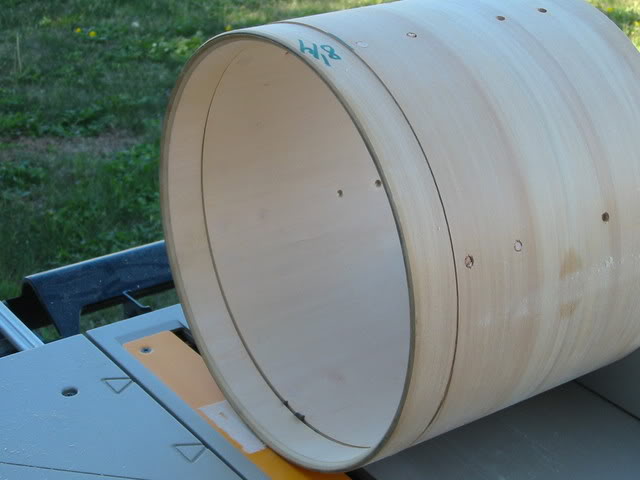
My first choice was to make one, deeper bass drum. That meant cutting off a couple rings from one drum and affixing them to the second.
My first choice was to make one, deeper bass drum. That meant cutting off a couple rings from one drum and affixing them to the second.
|
|
I did that back in the 70's with the bass drum I ended up using in Legend, a 24" deep by 26" diameter. I would have just typed 24x26 but, today, with the two different ways drum dimensions are now listed, it isn't always easy to know which is depth and which is diameter. I have always said the American version - 8x12. Somehow, the Euro/Asian version caught on - 12x8. One looks at the drum from the top/head and goes right, then down the depth. The other starts with reading the drum's left depth, goes up and right, across its diameter. Don't ask me why.
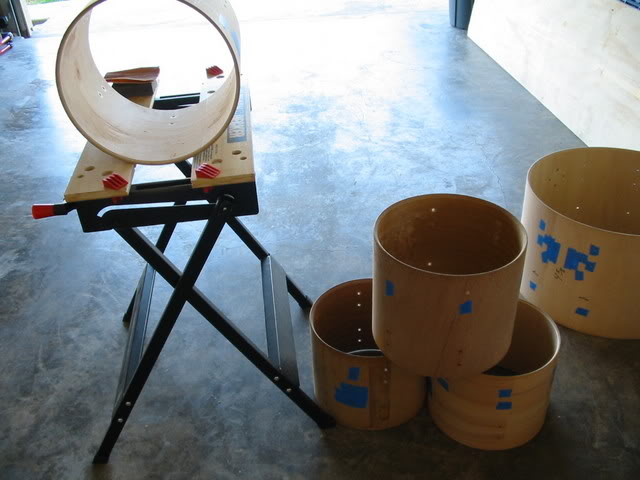
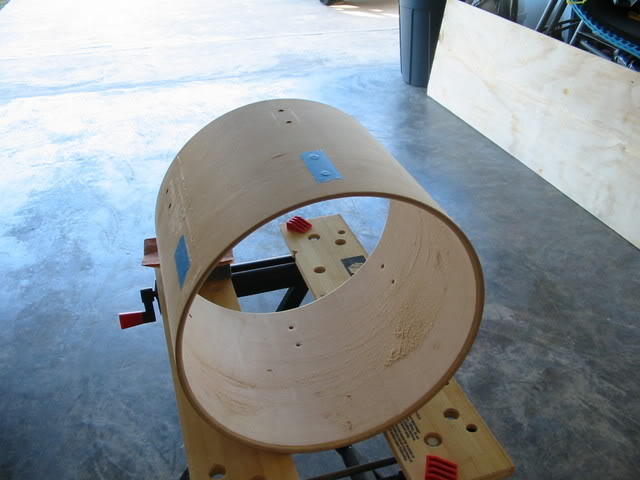
Then came the task of filling a lot of holes that would not be used.
Then came the task of filling a lot of holes that would not be used.

|
|
Filling holes is easy enough. You buy filler or make some out of a mix of glue and sawdust. Taping over the holes makes sense but, some times you'll have to apply filler in possible gaps where the filler did not totally sit fully into the hole. When it dries, remove all the tape and see what you've got. You may have to add a touch to unfilled holes. Use a putty knife and scrape the filler in good and make sure anything not associated with the holes is cleaned off to lessen work in sanding smooth.
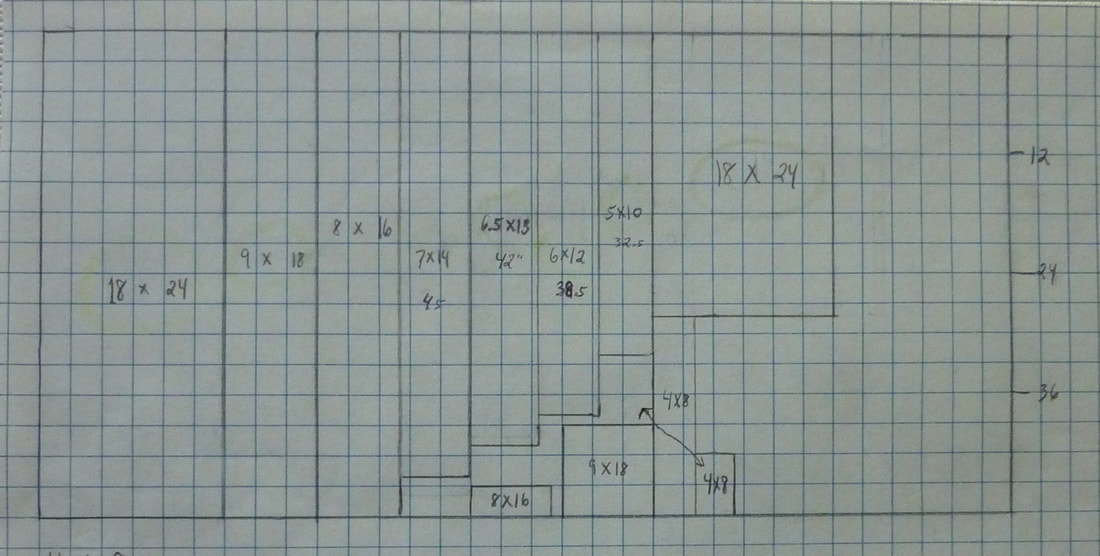
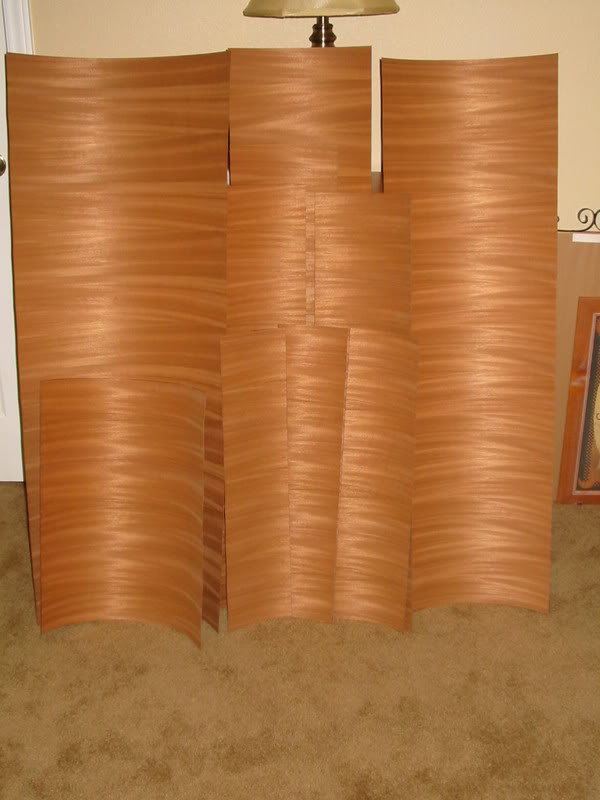
Next came veneering. I bought a 4'x8' sheet of BFV, from Oakwood, and began the layout of the pieces needed. I first do this on a sheet of quadrant paper. Depending on the size of your shells and the direction you run the veneer will decide if one sheet will work or more is needed. You can also purchase some species in 4x10 and 4x12.
Horizontal, with the grain is the typical fashion used. I like vertical, against the grain for two reasons. When I began veneering shells it was different, and it is easier to wrap around a shell. The grain bends easily. The sheet comes rolled up with the grain but, outside in, which means you have to apply it to a shell against its memory form. It can done, of course but, it's a lot easier cutting the veneer against the grain and wrapping a round surface.
If you are into wraps, that's another animal. Most come in smaller sheets of 27" x 54" give or take. The same lay- out principle would apply, though.
Just multiply your shell's diameter times Pi - 3.141 and you'll get your lengths for each shell. Then it's jigsaw puzzle time. Once you have what you need, it all transfers to the real thing. A 10" shell would just under 32" and generally leave the extra both in length and width. You can easily cut extra material off the shell later. It just removes the hassle of having to be perfect when you lay it down on the shell. In some cases of larger drums you have to add a small piece to cover the circumference but, the same is often done with traditional wraps, too. With the grains running vertically, the seams are next to invisible.
The sheet below is an old one I found in a notebook, and I believe was used for my first "half-tom" conversion, cutting down deeper sizes. In the case below every square represents three inches.
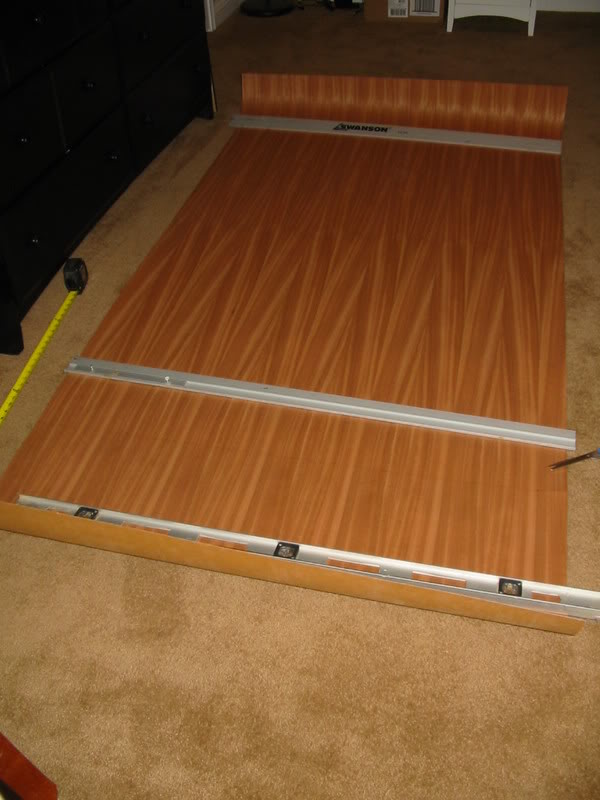
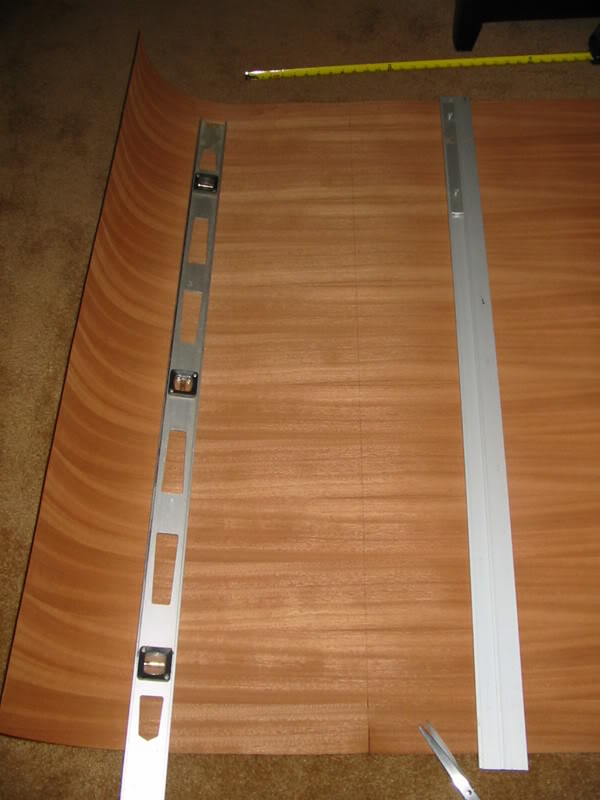
When an 8' sheet arrives coiled up in its box, it'll have that memory to its shape and makes it a chore to keep flat when laid out. Depending on your surface: floor or bench or table, etc., clamp down the corners, or just reverse the sheet and let it lay down for awhile till it relaxes flat.
Veneer is easy to cut with a box cutter or scissors. Using a full length ruler or straight edge of some kind is essential. That can be a sheet material T-square used on plywood or drywall; or as long a straight-edge as you have. In the case of that renovation I was using a 4' level and a power tool straight-edge that comes in two, 4' pieces. Now I have a large 6' steel ruler. But, if all you have is a tape measure and a solid, straight piece of anything, you can do it just fine.
Veneer is easy to cut with a box cutter or scissors. Using a full length ruler or straight edge of some kind is essential. That can be a sheet material T-square used on plywood or drywall; or as long a straight-edge as you have. In the case of that renovation I was using a 4' level and a power tool straight-edge that comes in two, 4' pieces. Now I have a large 6' steel ruler. But, if all you have is a tape measure and a solid, straight piece of anything, you can do it just fine.
|
|
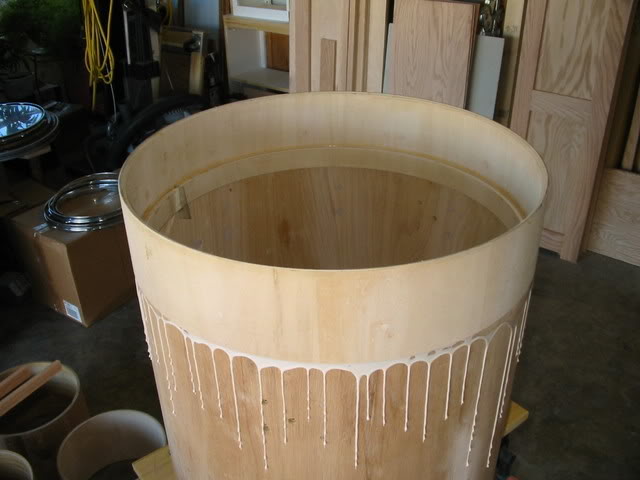
When you have all your pieces, time to affix them to the shells.
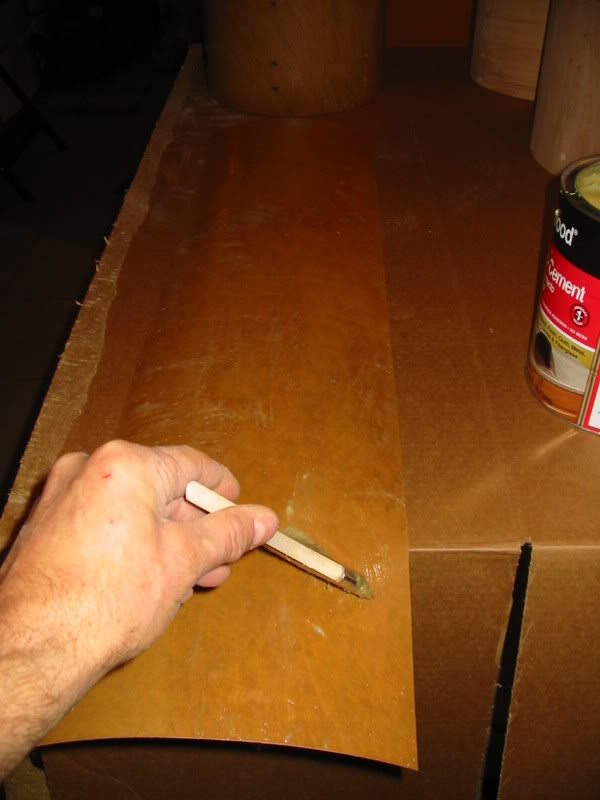
I have used common Contact Cement, spray glues, and a tape made by FastCap that is incredibly strong but, expensive - Speed Tape. They all work. Contact cement is the general material of use. Brush it on, roll it on, pour it on and move a thin layer out with a piece of wood, or whatever works for you. Do your best to avoid a mess on both the shells and the sheets of veneer... and your workspace, for that matter. Look closely at how the material tacks-up. You may have to touch-up some spots with a little more cement.
I have used common Contact Cement, spray glues, and a tape made by FastCap that is incredibly strong but, expensive - Speed Tape. They all work. Contact cement is the general material of use. Brush it on, roll it on, pour it on and move a thin layer out with a piece of wood, or whatever works for you. Do your best to avoid a mess on both the shells and the sheets of veneer... and your workspace, for that matter. Look closely at how the material tacks-up. You may have to touch-up some spots with a little more cement.
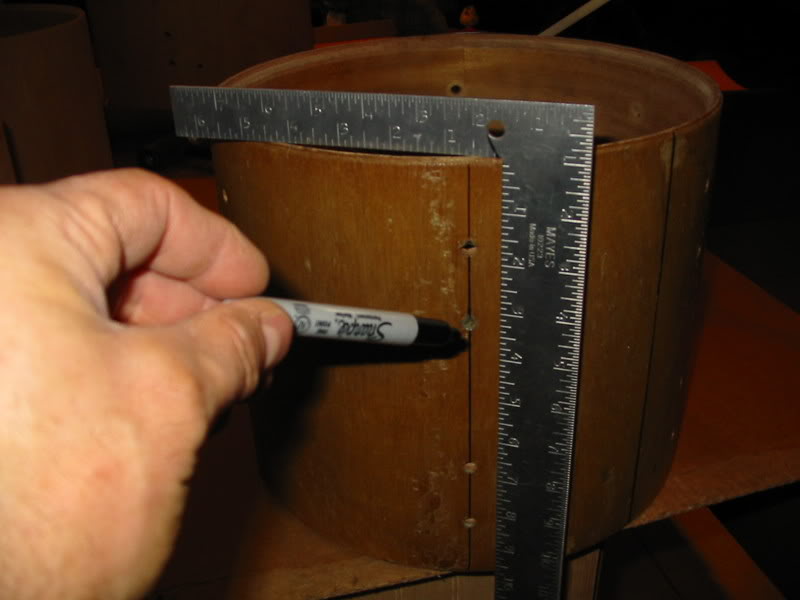
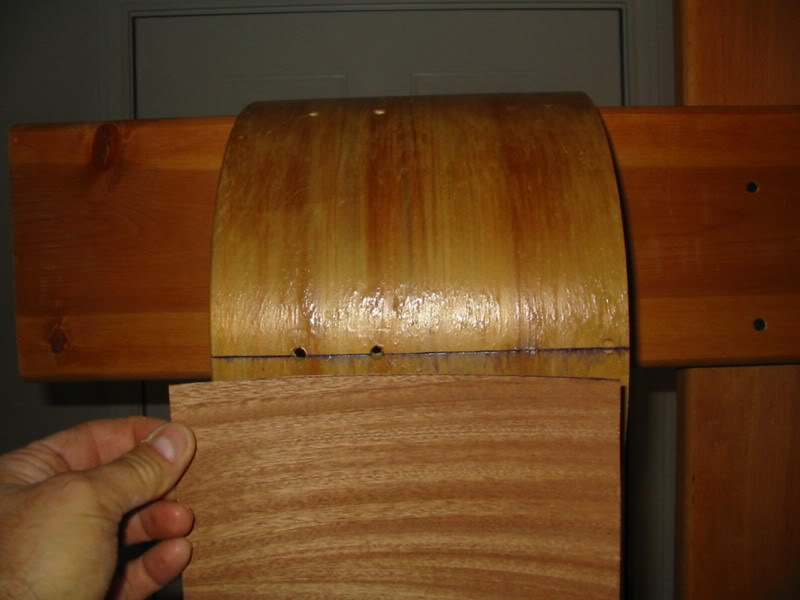
Take a square and mark a line in the middle of some lug holes, so lugs will basically cover some of the seam and also add some strength to the joint.
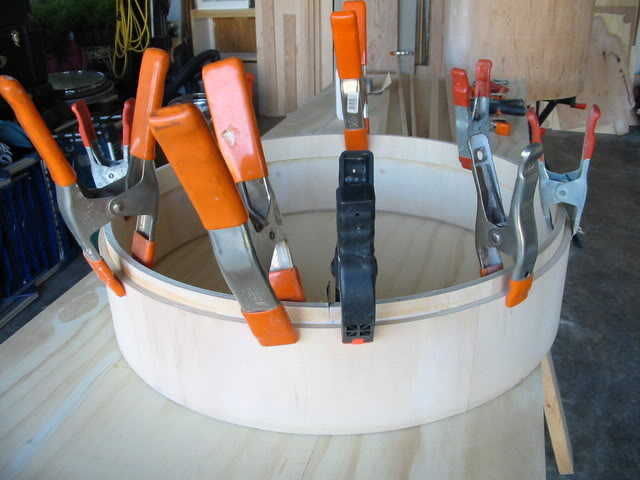
I make a simple "T" or "L" frame to clamp into a Workmate to hold the shells higher than the longest piece of veneer. Can't have it touching to floor. Big trouble. I also use it to put the final finish on the shells. Once you glue up the shell and the veneer piece and let it tack-up, place an edge against that line and slowly, gradually, press the veneer against the shell, |
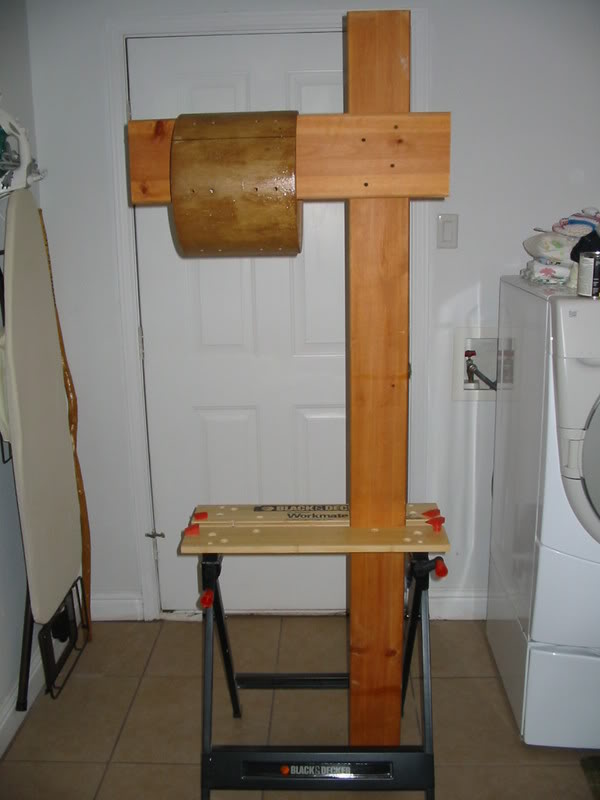
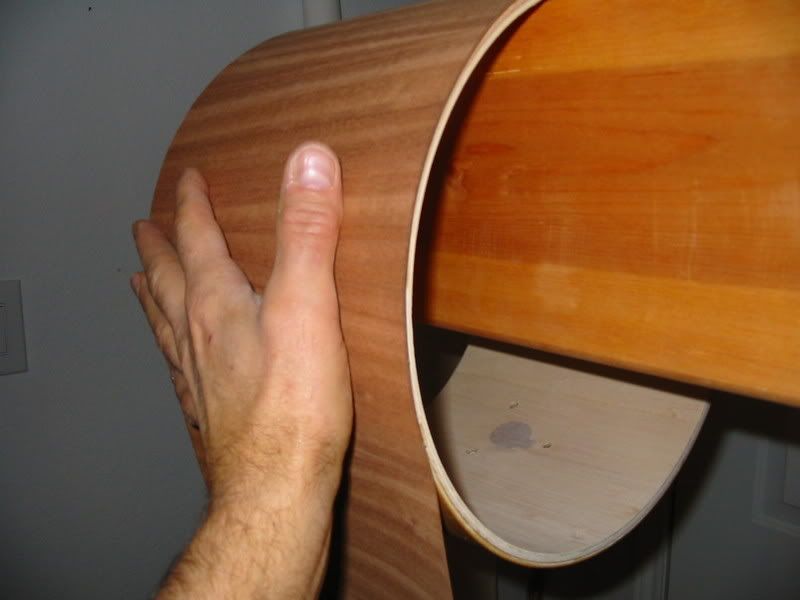
evenly so no bubbles can get trapped. Use yourflattened hand or a piece of wood, whatever works best for you.
|
When you come around to the end, you can leave an overlap or make a cut to join the ends.
|
|
You can see I laid the veneer down just a touch out of level at the beginning, which ended up being 1/8" out at the end of the affixing to the shell. Hence, the extra width of a piece: room for mistakes, and remember, while you may be just a tiny fraction of an inch out of level when you begin, that compounds as you go around the shell. Bigger the shell, the more it goes off. My problem used to be using a marker line. Now I use a sharp pen or pencil line or even a knife line to start the first edge going down.
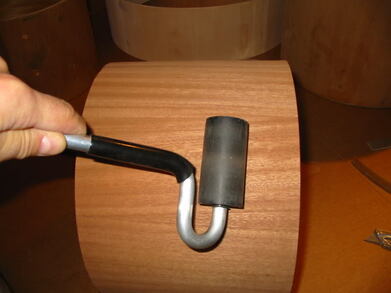
One thing easy about being a little off; if you want to butt the ends together, you can see where the layer underneath begins. Use a square and draw up a line and then knife that line and pull up your waste. Butt ends joined. Get yourself a J-roller to make sure the veneer is pressed down well against the shell. Some people use a block of wood and scrape it along, or tap the block against the shell. The best process for a DIYer is a vacuum press but, I never did this enough to warrant the expense.
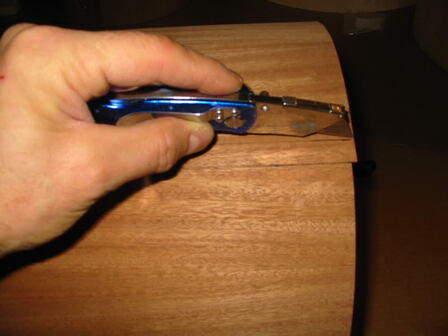
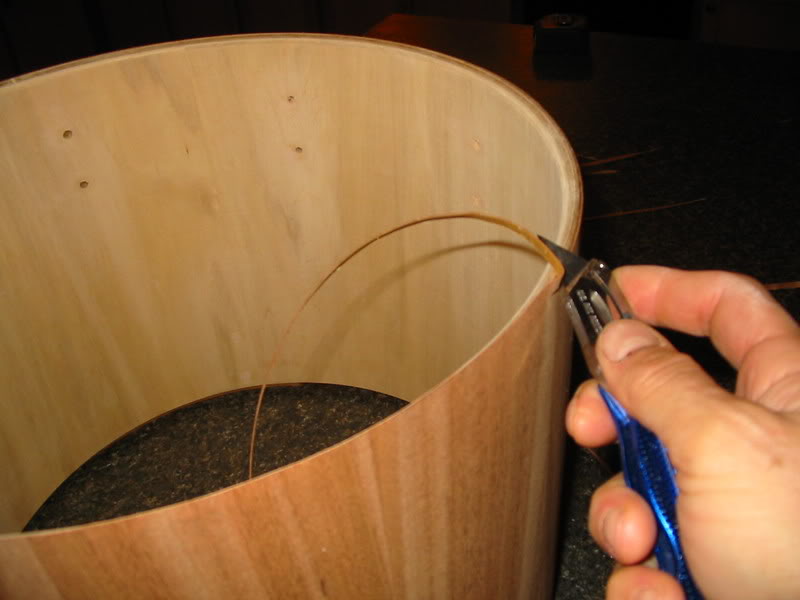
Use a box cutter to remove your extra veneer.
One thing easy about being a little off; if you want to butt the ends together, you can see where the layer underneath begins. Use a square and draw up a line and then knife that line and pull up your waste. Butt ends joined. Get yourself a J-roller to make sure the veneer is pressed down well against the shell. Some people use a block of wood and scrape it along, or tap the block against the shell. The best process for a DIYer is a vacuum press but, I never did this enough to warrant the expense.
Use a box cutter to remove your extra veneer.
|
|
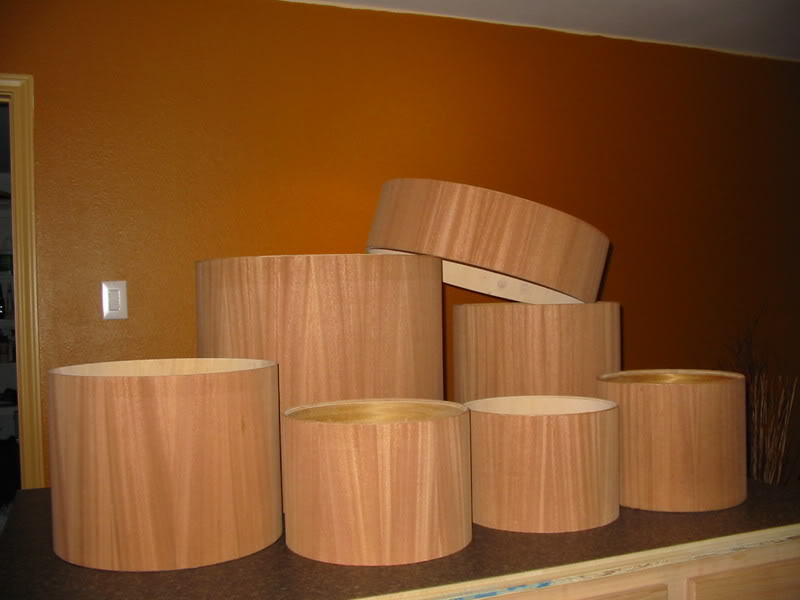
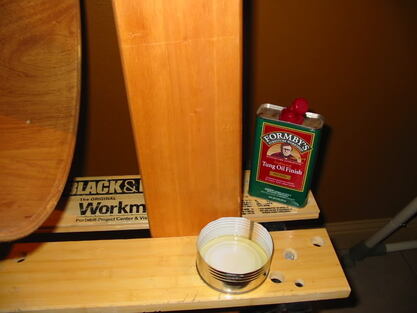
They look nice even without a finish on them and here you make your next decision. Waxes, Satin, Semi-gloss, Gloss finish. Spray or hand apply. I never had the environment for spraying. Did it once with canned spray. Did not like the results. Just went to hand applied finishes.
In this case, my general favorite, Formby's High Gloss Tung oil, which is not a pure or true Tung oil but, it's easy to use, and unfortunately, no longer available. Polyurethanes are out there and other products, all ready for DIY use. Just follow the directions. Oil-base finishes will add an amber color. Water-based are crystal clear.
Vacuum and tack cloth your shells before putting the first layer of finish down.
|
|
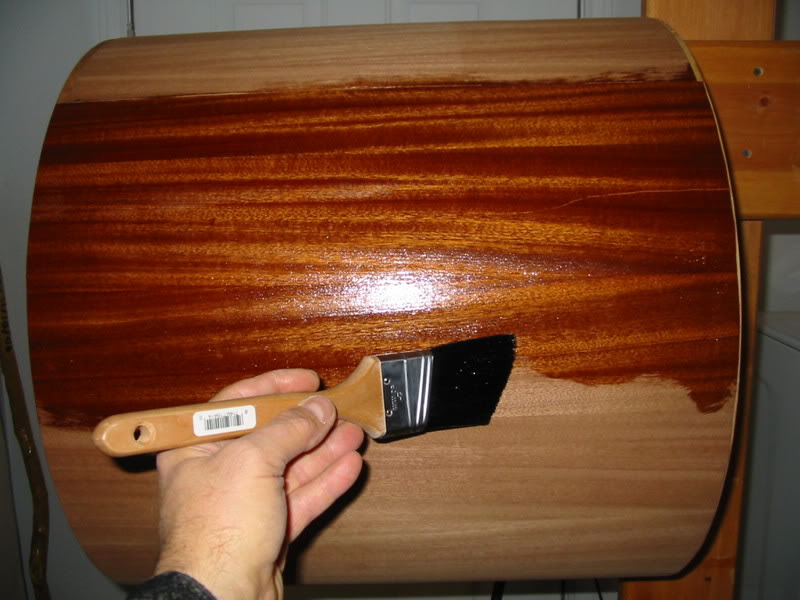
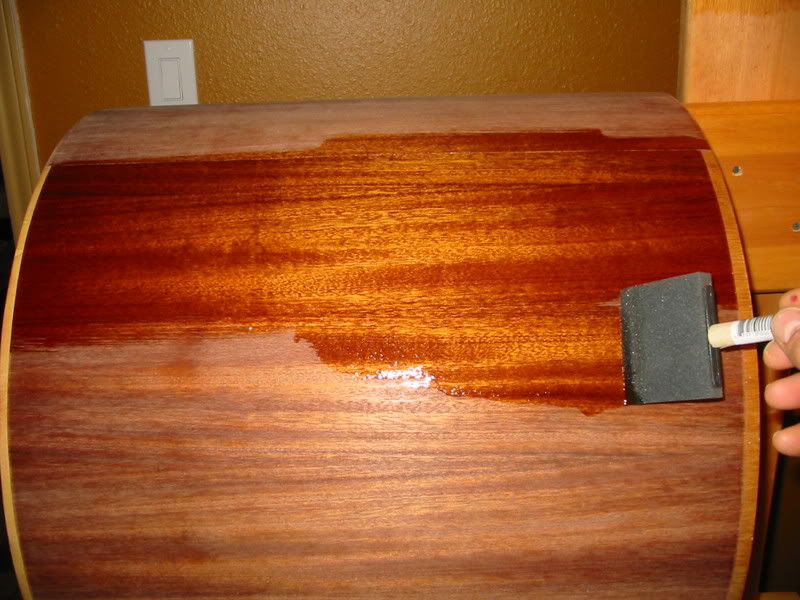
I've always used sponge brushes for the ease of it. You can also use China bristle for oils and synthetic brushes for water-based finishes. Lightly go with the grain.
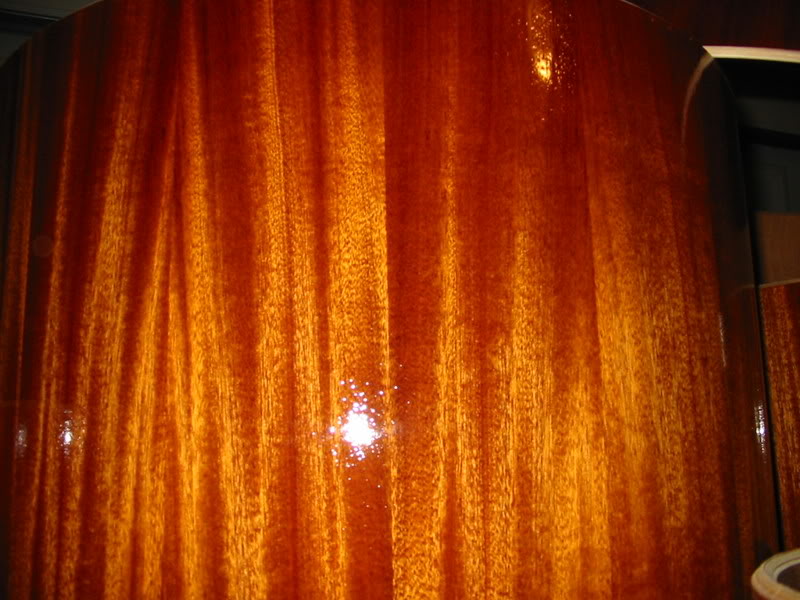
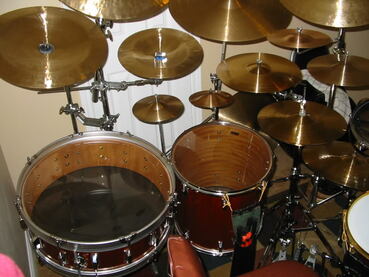
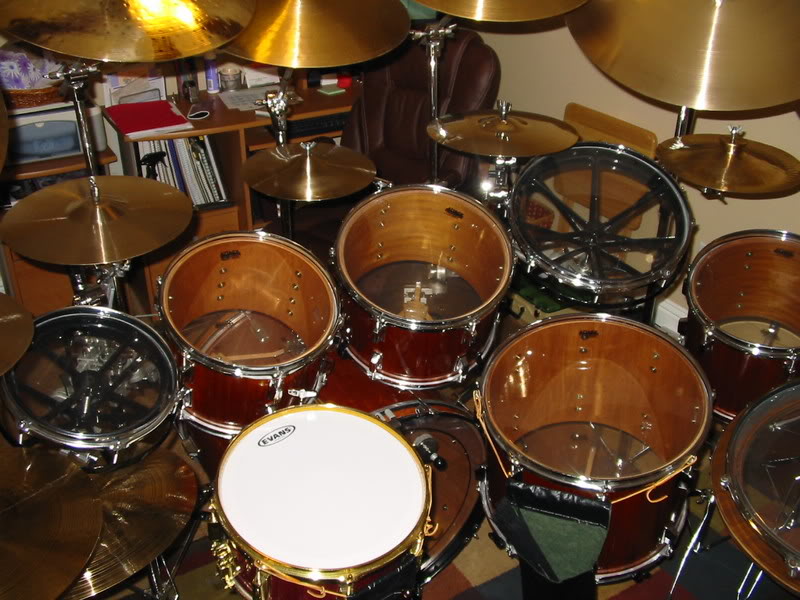
If you look close you can see the grain patterns, as well as natural imperfections.
You'll notice the bare edges left and right in the second picture. You may need to take off a half inch of material to allow heads to fit well. Shell sizes can differ by just millimeters, as well as manufactured drum heads, and all counted in, can make a drum head a tight squeeze. You can see the shell was a little out of round which is why I just took off what was necessary on the circumference of the shell. Does not affect how the bearing edge and head marry, if you have a proper edge to begin with. If not, well, I generally put my own on, anyway.
The grain really pops when that moisture hits it. Oils take 8 hours to dry. Water-based much less time, depending on humidity, which can be a real problem, like here, in Texas. You can lightly sand or put another coat on, which I generally do. Than I sand before each new coat and beyond for most shell surfaces. My stacked plywood ring shells are a whole other animal but, when it comes to veneers, while there are differences in wood grain textures, they all fall into the same finish routine for me.
220 grit, 320, 400 and a final coat for me, up to as many as 12 coats, depending on the reflection of my face when I look into the shell. Perfect mirror finishes? No thanks. Drums are way too easy to scratch up, even just dusting them. Even perfectly smooth, drum wrap plastic will scratch, just running a finger across them. Scratch resistant is NOT scratch proof. Bear that in mind. When I see a decent reflection of my face when holding the drum up at the right angle, I'm good.
Honestly, a lot of the time, like here, I just enjoy looking at the texture of the grain come through a little. I don't need a glass-top coffee table finish. If that's what you want, expect to get into wet sanding, which is whole other, drawn out ball game.
|
|
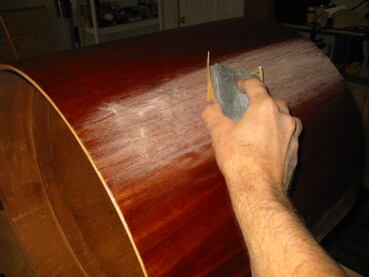
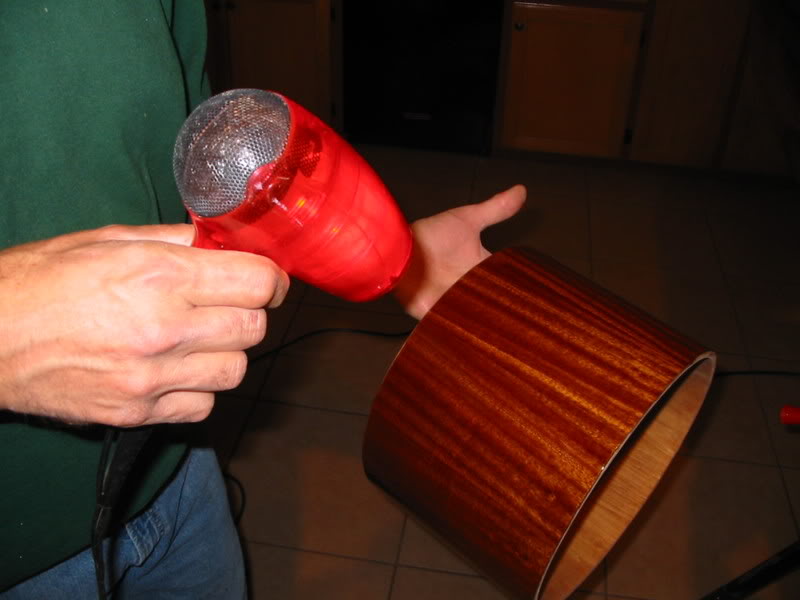
Lightly sand with the grain. Vacuum and tack cloth. Next thin layer. I use a hair dryer to tack things up so nothing runs, sags or drips on me.
Looks pretty when it's done. The tiny spots is the grain texture capturing light. A really smooth, mirror finish will show a smooth and seamless spot of light from a flash. Even on some semi-pro, manufactured drums you may see streaks from whatever device was used to apply a finish. It used to be that way on even pro-line drums but, today's spraying equipment, and booths in manufacturing plants are the go to way to finish many drum lines. It's just faster.
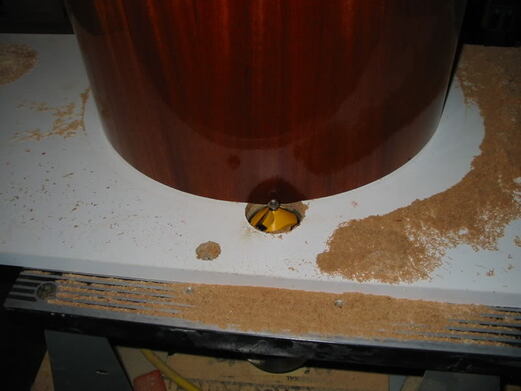
The bearing edge process is quite simple. A table, a bit, the roller bearing on the bit keeps the shell at the proper distance, and you just turn the drum shell in the proper direction. You'll know that right away. The wrong direction will take the shell and want to throw it. Therefore, depending on your router (and most all motors spin clockwise), turn the shell counterclockwise. The amount you take off, and the edge profile from bits you choose, and where you place those edges on the plies of the shell is up to you. The only thing that really matters is making sure the collar apex of the head, where collar meets flat, sits evenly on the shell's edge. Out in the flat is a waste, and back in the collar will mess up tuning. I address that in various videos on my YT channel, REFondrums, in the series about drum shells and sound.
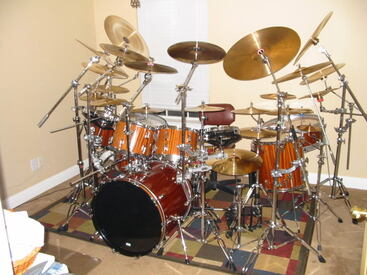
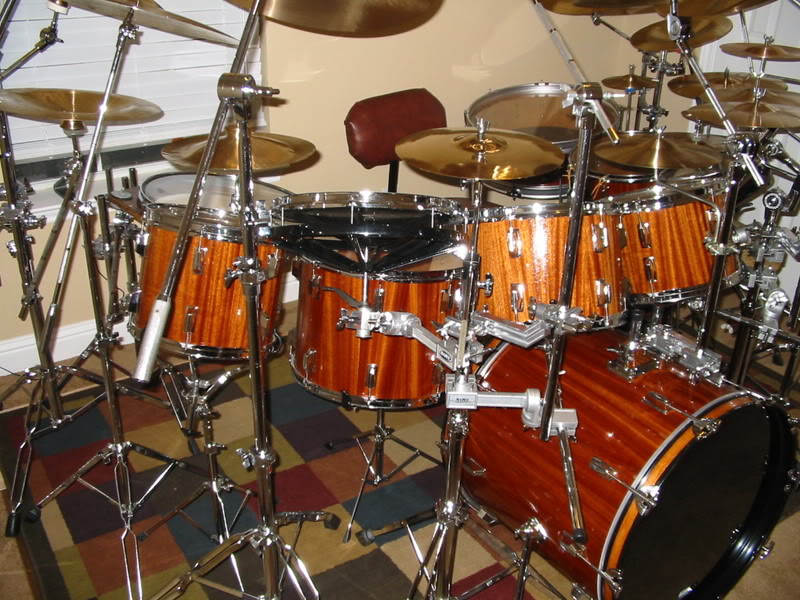
Well, when the whole mess was all back together, including a 5x22 on legs, and some other voices added in, and new heads all around, and a Purpleheart stave snare drum, it all looked like this:
|
|
|
|
|
And no matter what set I own, it grows. They always grow. I had the set-up for awhile and ended up selling it, to a guy that used it in his church services!!! including a rack of 6" pancake drums I made. And the Purpleheart, which I wish I did not do. Very nice drum, probably worth the price of the whole kit I sold it for. But, wood is wood. I could make Purpleheart snare drums every week. I just gave that guy a whole lot more than what he paid for. On the other hand, he bought a renovated beginner's set of drums. They sounded great. I got my money back for materials. My time? No but, such is life, in the world of used drums.
|
Oh, heck no! Not the cymbals. He was on his own there. Nor a lot of the hardware. Stuff's expensive.
So, there it is. A drum set renovation.
I've done it numerous times. Matter of fact, I purchased some inexpensive drums off ebay and added them to the set at some point: a 10" tom and a 10" or 12" x14" and a 12"x15" parade drum I picked up cheap, iirc. The growth factor.
At some point you can't or shouldn't, or at least think about putting a pearl necklace on a pig but, in most cases, any drum(s) can be spruced up and made use of in any context of music, recording or live.
Good heads, good bearing edges, good mounting for full shell vibration and get good sound. Wood species just does not matter much at all, if at all, as I show on my YT channel, and even proved here; for this set was who knows what kinds of wood, all tolled but, all tuned up, all you heard was pitch variation, not wood specie variation.
D.I.Y. I was born for it.
